How to Build a DIY Rain Garden for Managing Roof Runoff
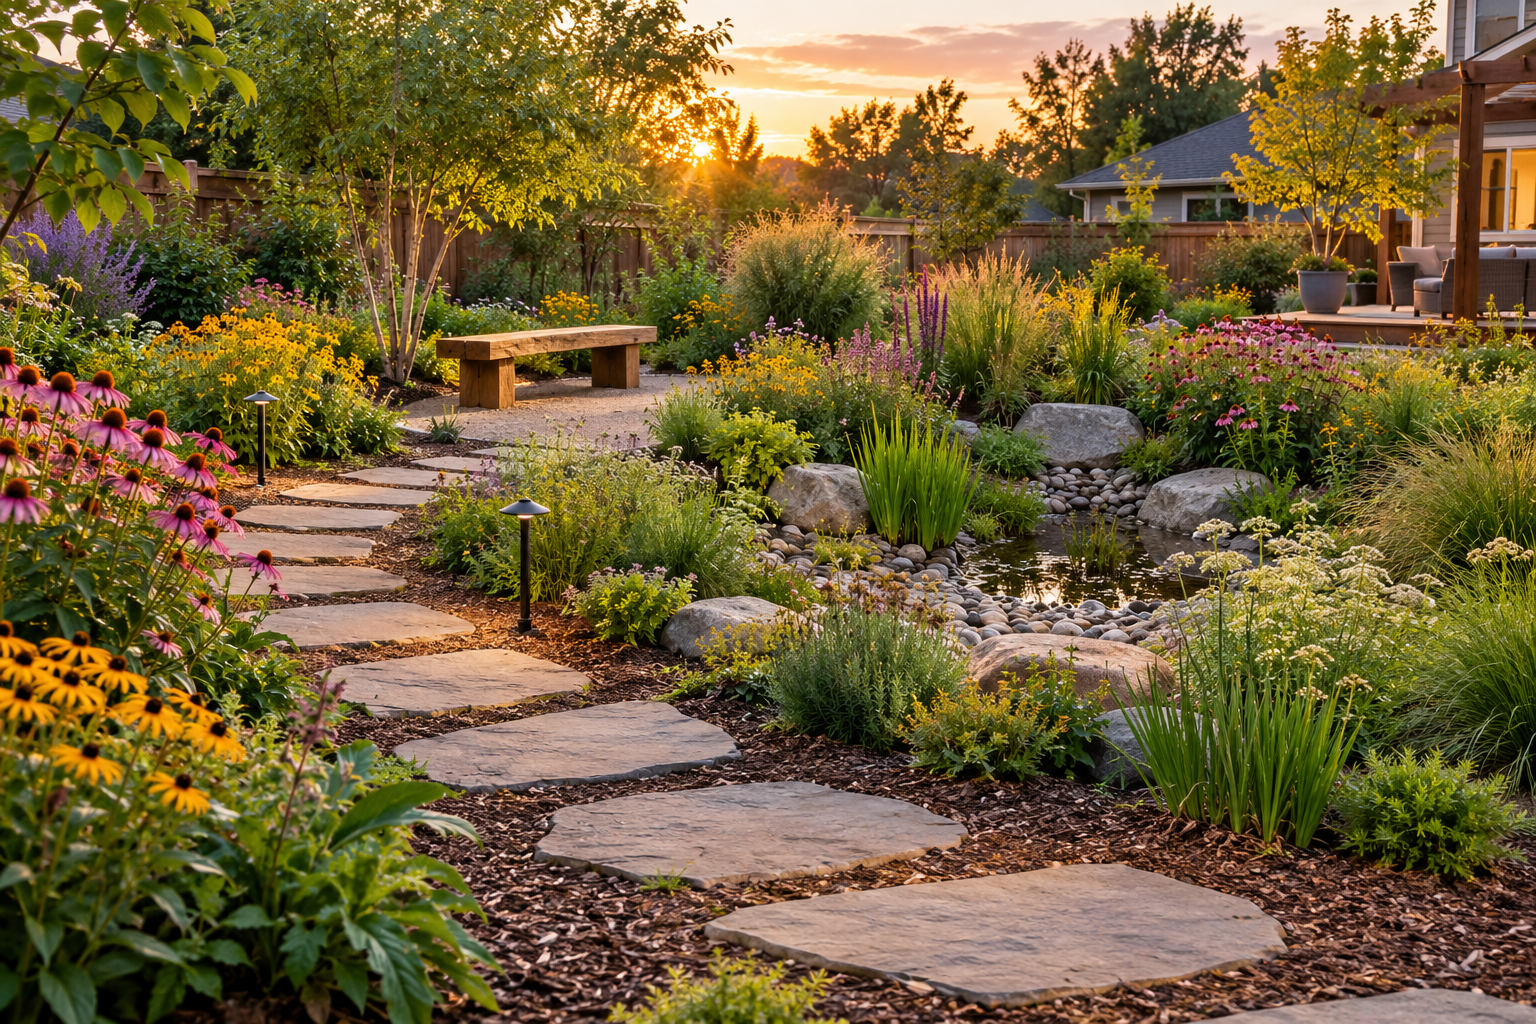
A rain garden is a functional, beautiful way to manage roof runoff while preventing erosion and supporting local pollinators. This guide explains how to design, excavate, and plant a sustainable rain garden that turns excess water into a thriving landscape feature, helping you reclaim your yard while protecting the local watershed.
Building a successful rain garden requires more than just digging a hole; it demands careful planning regarding soil health and drainage capacity. While this DIY project is highly rewarding, it does require a realistic assessment of your site’s topography and existing vegetation to ensure your garden manages heavy rainfall effectively without causing flooding.
In the following sections, we will walk through the essential steps for creating a productive, evidence-conscious landscape. You will learn how to improve your soil, select native plants that thrive in fluctuating moisture, and integrate your rain garden into a broader, wildlife-friendly ecosystem that promotes long-term sustainability and lush, vibrant growth.

Planning and Site Selection
The foundation of a successful rain garden lies in strategic site selection. Because your goal is to capture and infiltrate roof runoff, you must balance proximity to your home with the safety of your structure. Aim for a low-lying area in your landscape that is at least 10 feet away from your home’s foundation. This buffer zone is critical to prevent water from seeping into your basement or compromising the structural integrity of your home.
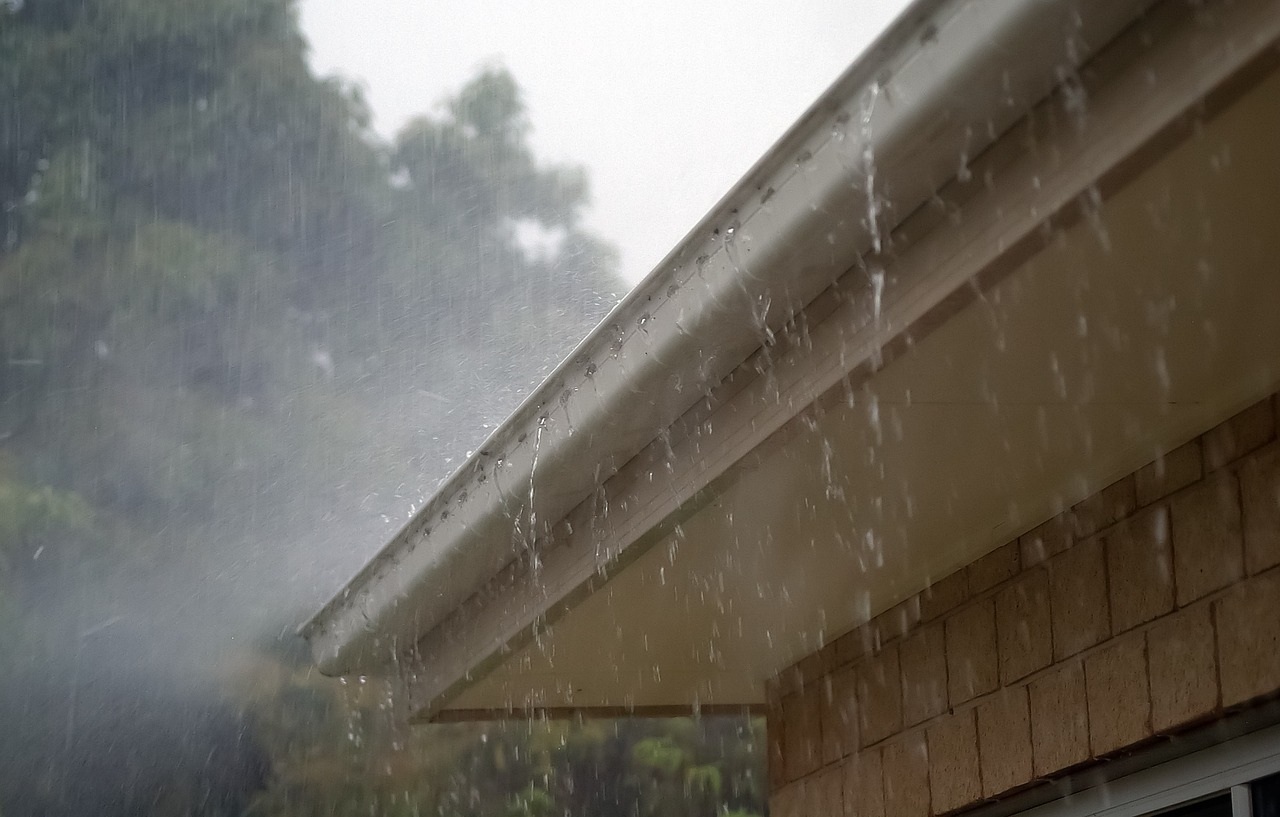
Start by observing your property during a moderate rainfall. Watch where your downspouts discharge and note the natural path the water takes across your lawn. Ideally, your rain garden should be located at the end of this path or directly beneath a downspout extension. If the terrain is perfectly flat, you may need to install a decorative stone swale or a buried pipe to direct the water toward your chosen site.
Before you commit to a location, you must verify that the soil can actually handle the influx of water. If your soil is heavy clay or compacted, it will hold water for too long, potentially drowning your plants or creating a breeding ground for mosquitoes. Perform a simple percolation test to ensure adequate drainage:
- Dig a hole approximately 12 inches deep and 12 inches wide in your chosen spot.
- Fill the hole with water and allow it to drain completely to saturate the surrounding soil.
- Refill the hole with water and measure how long it takes to drain away.
- If the water drains at a rate of at least one inch per hour, the site is suitable for a rain garden.
If the water remains in the hole for more than 24 hours, you may need to amend the soil with organic compost or sand to improve porosity, or choose a different location entirely. Avoid areas where the water table is naturally high, as these spots will not provide the necessary dry-down period required for most rain garden plants to thrive.
Safety must be your top priority before you break ground. Even if you are only digging a shallow depression, you risk striking buried utility lines. Every region has a dedicated utility locator service—often reached by dialing 811 in the United States—that will mark the location of underground gas, electric, and water lines for free. Never skip this step; it is the most important part of your site planning process.
Finally, consider the long-term health of your garden and the surrounding wildlife. Choose a site that receives at least six hours of direct sunlight if you plan to plant sun-loving native perennials. Avoid placing your garden directly over septic systems or near existing large tree root zones, as the excavation could damage established root systems and jeopardize tree health. By carefully selecting a spot that naturally collects water while respecting your home’s infrastructure, you create a sustainable, self-watering landscape that supports local pollinators and effectively manages stormwater runoff.
Safety Precautions for Excavation
Excavating a rain garden is a rewarding way to manage roof runoff, but it requires careful physical preparation to ensure the project remains safe and sustainable. Before breaking ground, prioritize your personal protective equipment (PPE). Sturdy, closed-toe work boots with good tread are essential to protect your feet from heavy tools, sharp rocks, and potential hidden debris. Heavy-duty gardening gloves will shield your hands from blisters, thorns, and abrasive soil, while safety glasses are non-negotiable when digging in dry or rocky terrain where debris can easily fly upward.
If your design requires a larger footprint, you may choose to use power equipment such as a sod cutter or a mechanical tiller to break up the turf. These tools significantly reduce manual labor, but they introduce new risks. Before starting the engine, read the manufacturer’s manual thoroughly to understand the kill switch and emergency shut-off procedures. Always clear the area of children, pets, and other bystanders, maintaining a wide safety perimeter. Never attempt to clear a jam or adjust the blades while the engine is running or even idling.
To protect your long-term health, adopt ergonomic digging habits. The most common injury during landscaping is lower back strain caused by improper lifting. When moving soil or heavy stones, follow these principles:
- Bend at the knees: Keep your back straight and utilize the strength in your legs to lift the weight.
- Keep loads close: Hold heavy tools or buckets of soil close to your torso to minimize leverage strain on your spine.
- Pivot, don’t twist: When moving a shovel full of dirt to the side, move your feet to turn your entire body rather than twisting at the waist.
- Take frequent breaks: Excavation is strenuous. Stop every 20 minutes to stretch your hamstrings and lower back to prevent muscle fatigue.
Beyond physical strain, be mindful of what lies beneath the surface. Before you begin digging to the required depth for your rain garden, contact your local utility location service to ensure you are not encroaching on underground gas, water, or electrical lines. Once you start digging, stay alert for hidden obstacles. Buried rocks, thick tree roots, or old construction debris can cause a shovel to kick back unexpectedly, potentially causing wrist or shoulder injuries.
Tool maintenance is a critical component of safety. A sharp shovel cuts through soil and roots with significantly less force than a dull one, which reduces the physical effort required and lowers the risk of slipping. However, sharp tools also demand increased focus. When you are not actively using a tool, store it flat on the ground with the blade facing downward or hang it securely on a rack. Never leave rakes or shovels standing upright in the grass or soil, as they create a significant tripping and impalement hazard.
Finally, consider the environmental impact of your excavation process. Soil health is the foundation of a productive rain garden. Avoid over-compacting the surrounding soil by walking on it repeatedly while you work. If the ground is saturated from recent rain, wait a few days before digging; working wet soil destroys its structure, leading to poor drainage and long-term plant stress. By respecting your own physical limits and the integrity of the soil, you ensure that your rain garden becomes a thriving, sustainable feature of your landscape rather than a source of injury or ecological disruption.

Designing and Excavating Your Basin
The success of your rain garden hinges on its ability to capture, hold, and infiltrate runoff before it overwhelms your landscape. Think of your basin as a shallow, functional bowl designed to slow down water movement. For most residential properties, a depth of 6 to 12 inches is ideal. This depth is sufficient to manage typical storm events without creating a permanent pond that attracts mosquitoes or drowns your plants.
Before you begin digging, mark the perimeter of your basin using a garden hose or spray paint. Aim for a kidney or teardrop shape, as these organic curves blend naturally into the landscape and help distribute water flow more evenly than rigid, straight-edged boxes. Once marked, remove the sod and begin excavating the center to your target depth.
As you remove the soil, keep the following structural best practices in mind to ensure long-term stability:
- Create a level bottom: The floor of your basin should be as flat as possible. This prevents water from pooling in only one corner and ensures that the entire garden surface area works to absorb moisture into the subsoil.
- Build a sturdy berm: Use the excavated soil to create a raised ridge, or berm, along the downhill edge of your basin. This berm acts as a dam, forcing water to stay within the basin long enough to soak into the ground. Pack this soil firmly to prevent it from washing away during the first heavy rain.
- Slope the sides gently: Avoid steep, vertical walls. Aim for a gentle slope—roughly a 3:1 ratio (three feet of horizontal distance for every one foot of depth). Gentle slopes are easier to plant, less prone to erosion, and provide a safer transition for local wildlife navigating the area.
Soil health is the engine of your rain garden. As you excavate, assess the quality of the earth you are working with. If your native soil is heavy clay, it will drain slowly. You can improve infiltration by mixing in organic matter, such as finished compost, into the top few inches of the basin floor. Avoid over-tilling, which can destroy soil structure; instead, work the amendments in gently to maintain the natural pore spaces that allow water and roots to penetrate deep into the earth.
Once you have finished shaping the basin, check for levelness. A simple trick is to lay a long board across the basin with a carpenter’s level on top, or wait for a light rain to see where water naturally settles. If one side is significantly lower than the other, adjust the berm height accordingly. A uniform depth ensures that your plants receive consistent moisture, preventing some areas from becoming waterlogged while others remain bone-dry.
Consider the long-term maintenance of your basin edges during the excavation phase. By keeping the side slopes gradual, you make it easier to mulch the area later. A layer of shredded hardwood mulch is essential in the first year to protect the soil from compaction and erosion while your plants establish their root systems. Because you are creating a habitat that will attract beneficial insects and pollinators, avoid using synthetic fertilizers or pesticides in the basin. These chemicals can be washed directly into the groundwater during heavy rain, defeating the purpose of your sustainable landscape project.
Finally, ensure that your design includes a stable “overflow” point. Even a well-designed basin will eventually reach capacity during an extreme weather event. Identify the lowest point of your berm and reinforce it with river stones or a small patch of hardy, deep-rooted groundcover. This provides a safe, non-erosive path for excess water to exit the basin and flow into the rest of your yard, preventing the berm from breaching and protecting your garden from washouts.
Selecting Native Plants for Infiltration
The success of your rain garden hinges on selecting the right native plants. Because a rain garden experiences dramatic cycles—soaking wet during storms and bone-dry between them—you need species with deep, fibrous root systems. These roots act as biological pumps, breaking up compacted soil and creating channels that allow water to infiltrate deep into the earth rather than pooling on the surface.
Native plants are the gold standard for this task. They have evolved over millennia to thrive in your local climate without the need for synthetic fertilizers or pesticides. By choosing them, you minimize your environmental footprint while simultaneously building a robust ecosystem that supports local pollinators, birds, and beneficial insects.
To ensure long-term survival, organize your planting based on the garden’s topography. A rain garden is essentially a shallow basin, meaning moisture levels vary significantly from the center to the outer edges.
Zone 1: The Basin Floor (The Wet Zone)
The center of your garden will hold the most water and stay saturated the longest. Select moisture-loving perennials that can handle “wet feet” and temporary standing water. These plants are the primary workers in your infiltration system.
- Swamp Milkweed (Asclepias incarnata): A favorite for Monarch butterflies that thrives in heavy, moist soils.
- Blue Flag Iris (Iris versicolor): Excellent for stabilizing soil and handling periodic inundation.
- Joe Pye Weed (Eutrochium purpureum): A tall, structural plant that loves moisture and attracts a wide array of pollinators.
- Cardinal Flower (Lobelia cardinalis): Offers striking red blooms and performs best in consistently damp conditions.
Zone 2: The Side Slopes and Edges (The Transition Zone)
As you move toward the perimeter of the basin, the soil drains more quickly. These areas are perfect for plants that appreciate periodic moisture but require good drainage to prevent root rot. This zone acts as a buffer, preventing erosion on the slopes of your rain garden.
- Purple Coneflower (Echinacea purpurea): Highly adaptable and provides essential seeds for birds in the winter.
- Black-eyed Susan (Rudbeckia hirta): A resilient, drought-tolerant bloomer that fills space quickly and effectively.
- Blazing Star (Liatris spicata): Features deep taproots that excel at breaking up dense soil.
- Wild Bergamot (Monarda fistulosa): A hardy perennial that thrives in average garden soil and is a magnet for native bees.
Evidence-Conscious Planting Tips
When installing your plants, avoid the common mistake of over-amending the soil. Native plants prefer the natural mineral content of your existing earth. Adding compost or fertilizer can actually encourage weak, rapid growth and make plants less resilient to the natural drought cycles of a rain garden.
Instead of heavy mulching, consider using a thin layer of organic mulch only during the first season to suppress weeds while plants establish. As the perennials grow and spread, they will create a “living mulch” of dense foliage, which naturally shades the soil, retains moisture, and suppresses weeds more effectively than wood chips ever could.
Always prioritize local ecotypes when sourcing your plants. A plant grown from local seed is genetically programmed to handle your specific rainfall patterns and temperature fluctuations. Check with local native plant nurseries or your regional extension office to identify which species are truly indigenous to your county. By aligning your plant choices with the natural hydrology of your site, you ensure a low-maintenance landscape that manages roof runoff while contributing to a healthier, more biodiverse backyard.
Maintenance and Troubleshooting
Like any productive landscape element, a rain garden is a living system that requires attentive care, particularly during its infancy. While these gardens are designed to be low-maintenance once established, the first two growing seasons are critical for ensuring your plants thrive and the system functions as intended.
During these early stages, your primary tasks are weeding and mulching. Weeds compete with your new plantings for nutrients and water, which can hinder the root development necessary for long-term success. Apply a two-to-three-inch layer of hardwood mulch across the basin to suppress weeds and retain soil moisture. As your plants grow and begin to cover the ground, they will naturally shade out weeds, reducing the need for manual intervention.
The most important diagnostic tool for a rain garden is observation following a heavy storm. Your garden is engineered to capture runoff and allow it to infiltrate the soil. Ideally, the basin should be completely dry within 24 to 48 hours. This timeframe is essential for two reasons: it ensures the health of your plants—which generally prefer not to sit in stagnant water—and it prevents the basin from becoming a breeding ground for mosquitoes.
If you notice standing water persisting beyond 48 hours, use this checklist to troubleshoot the issue:
- Check for debris: Inspect the inlet and the basin floor for leaves, mulch, or sediment that might be clogging the drainage path. A quick clearing of the inlet often restores proper flow.
- Assess soil compaction: If the soil feels dense or hard, it may not be absorbing water efficiently. Gently aerating the soil or adding organic matter, such as high-quality compost, can improve soil structure and porosity over time.
- Verify plant selection: Ensure your chosen species are appropriate for the moisture levels of your specific site. If you have chosen plants that require drier conditions, they may be struggling, which can impact the overall health of the garden bed.
- Monitor sediment buildup: Over time, fine particles from your roof runoff can settle in the basin and create a “crust” that inhibits drainage. If this occurs, gently rake the top layer of soil to break up the surface.
If water continues to pool after you have addressed these common issues, it may indicate a deeper drainage problem within your native soil. In such cases, consult with a local landscape professional or a soil scientist. They can determine if your soil has a high clay content that requires deeper amendment or if the installation of an underdrain system is necessary to handle the volume of runoff from your roof.
Beyond drainage, evidence-conscious plant care means avoiding synthetic fertilizers and pesticides. Rain gardens are designed to filter pollutants from runoff; adding chemicals to the garden defeats this purpose and can harm the beneficial insects and wildlife that your landscape supports. Instead, focus on building soil health through the annual application of organic compost. This fosters a robust community of soil microbes, which in turn helps plants access nutrients more efficiently and builds natural resilience against pests and diseases.
As your garden matures, it will become a self-sustaining ecosystem. By keeping a watchful eye on drainage and providing minimal, targeted maintenance in the first few years, you ensure that your rain garden remains a functional, beautiful, and environmentally responsible part of your home landscape for years to come.
Once established, your rain garden functions as a self-sustaining ecosystem. To ensure long-term soil health and plant vigor, focus on supporting the soil microbiome rather than applying synthetic fertilizers. Top-dress the base with a thin layer of organic compost each spring; this feeds the soil organisms that break down organic matter and improve drainage, effectively managing the nutrient load from roof runoff.
Productive raised beds and rain gardens share a need for consistent, evidence-based care. Avoid over-pruning native perennials in autumn. Leaving hollow stems and seed heads provides essential winter habitat for beneficial insects and birds, while the decaying foliage acts as a natural mulch that protects root systems from frost heaving. If you notice persistent standing water for more than 48 hours after a heavy rain, the soil may have compacted. Gently aerate the edges with a broadfork, being careful not to disturb the primary root zones of your established plants.
For a thriving, wildlife-friendly landscape, monitor your garden for invasive species that may hitchhike via runoff. Early detection is the most effective form of pest management. Use this checklist to keep your garden functional and healthy:
- Bi-annual Inspection: Clear debris from the inflow point to ensure water enters the basin without obstruction.
- Mulch Management: Replenish hardwood mulch annually to suppress weeds and prevent erosion, but keep the base of plant stems clear to prevent rot.
- Invasive Check: Remove non-native weeds by the root during the spring growth flush.
- Sediment Removal: If you notice a buildup of silt at the entry point, shovel it out once per year to maintain the garden’s storage capacity.
Realistic follow-up is key to success. During the first two years, treat your rain garden like any other new planting; if a drought occurs, provide deep, infrequent watering to encourage roots to grow downward. Once the deep-rooted native species are fully established, they will thrive on rainfall alone. If a specific plant repeatedly fails, replace it with a more resilient native species that matches the specific moisture levels of your garden’s microclimate rather than attempting to alter the soil chemistry.